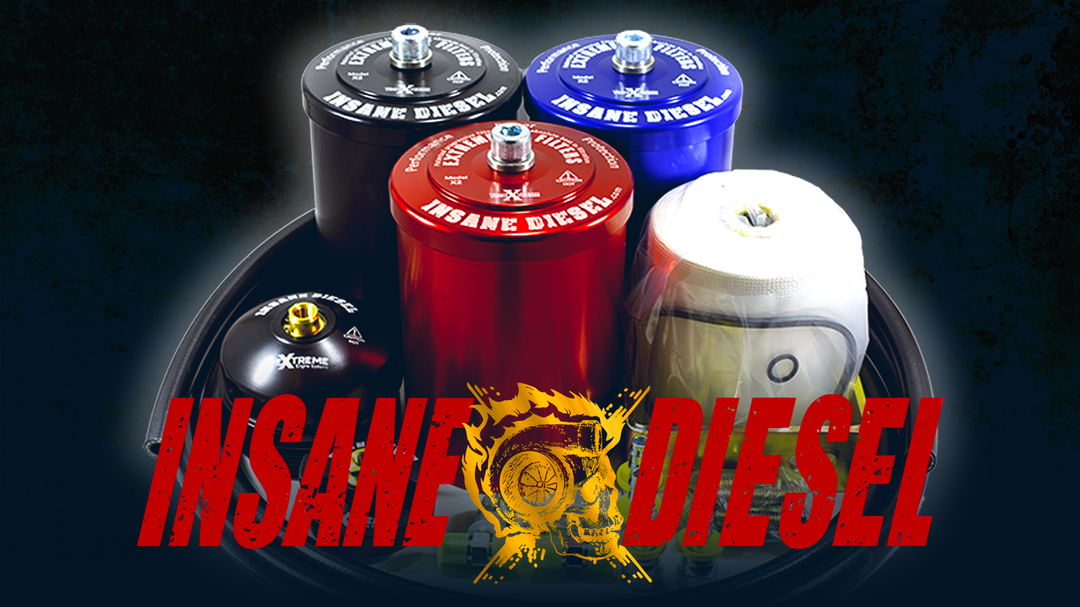


Duramax 2.8 Colorado & Canyon Installation Guide
Parts List:
- Your kit includes the following:
- 1 "EXTREME1" bypass oil filter housing
- 1 "EXTREME1" filter element (EX1SE)
- 4 Hose fittings - PART "e" (AN06-06FJ)
- 2 In/Out fittings - PART "d" (AN06-04MS90)
- 1 Custom pressure port tee fitting with multiple ports + doughty ring and crush washer - PART "h" (TM1275RR)
- 1 Elbow Center tee fitting for pressure port tee - PART "f.1" (AN06-02MP90)
- 1 Straight Center tee fitting for pressure port tee - PART "f.2"
- 1 Black Duramax oil filler cap with swivel return port - PART "a" (FLLCDUO)
- 1 Oil filler cap fitting - PART "c" (AN06-02MS90)
- 3ft and 4ft of hose (LW06BK)
- Mounting Options
• 1 Black under-the-hood bracket - PART "b" (UTHL)
• 1 Zinc coated standard bracket w/ hardware - PART "i" (ZBRCKX12)
Additional items you may need: Teflon tape or blue thread sealer, and zip ties.
-----------
Important Torque Specs for Fittings:
• Straight fittings torque specs: do not exceed 5ft lbs (60 in lbs)
• Tapered fittings torque specs: do not exceed to 18ft lbs -35ft lbs.
Each fitting's torque specs will be included in the following instructions.
Before you begin be sure to assemble the hose and hose fittings first but please keep parts "f.1 & f.2" separate from the hose preparation process. The only fittings involved in the hose preparation process is part "e" (the image below shows a single part "e" but the other parts "e" may come separate or partially connected to part "c" and "d") . You can learn how to prepare the hose fittings here.
----------

INSTALLATION GUIDE:
- Be sure the hose fittings and fittings are assembled before beginning, scroll up to see the link to the hose preparation guide.
- Using thread sealant or Teflon tape, connect the fitting (part C) to the oil filler cap (part A) . The swivel feature allows you to tighten the fitting and cap without needing to adjust the position of the hose. Replace your stock oil filler cap with this new oil filler cap and make sure the cap is tight and secure.

- Apply Teflon tape to the two elbow fittings (part “d”) and insert them into the “IN” and “OUT” port of your EXTREME X2 filter housing. Install as firmly and deep as possible. Be sure to not exceed 5ft lbs torque.
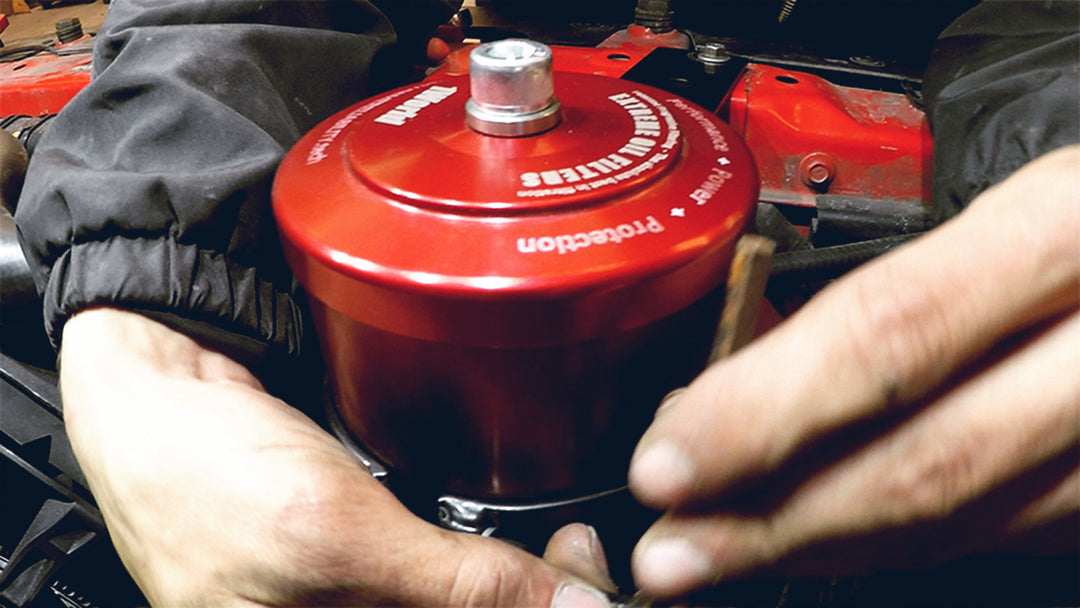
TIP: To avoid scratching your new filter you can use the bracket, and a vice, to hold the filter in place while you tighten the fittings. See images below. The image displays the older fittings inserted into the in/out ports, you're fittings will be black ELBOW fittings that are already attached to your hose.

REMOVE THE AIR INTAKE HOSE TO MAKE ROOM
We’ll be working mostly around the passenger side of the engine, remove the air intake hose to make room.

OIL PRESSURE PORT
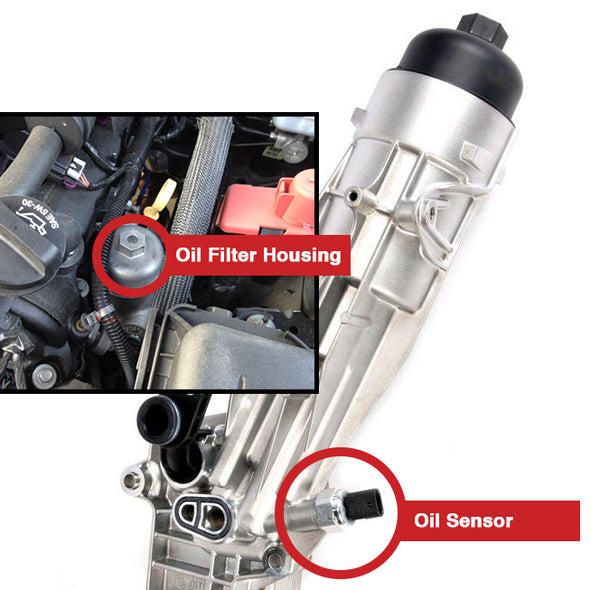
- Locate the stock oil filter housing found on the passenger side of your vehicle. Locate the oil sensor that is positioned towards the front of your vehicle. See image below for reference.
- Carefully disconnect the wire from the oil sensor:
- Pull the lock tab open by pulling it away from the oil sensor, you can feel it click open.
- Once the lock tab is open you can squeeze it inward to release the cable from the sensor.
- See image below for reference.

- Once the cable is disconnected remove the oil sensor (24mm socket wrench)
- Apply thread sealant to part "h" and to the 3 center branch plugs that plug the 3 center ports of part "h". At this time it's recommended to verify which of the center branch ports (on part "h") will be used to connect the hose fitting. Keep the plugs separate for now until the center branch port is verified. The following step is how to verify which port will be used.
- Part "h" should include a doughty ring and an optional crush washer, it's recommended to place the doughty ring on the male threads of part "h" and securely threat part “h” into the oil sensor’s port on the engine.
IMPORTANT: The most recent version of "part h" has 3 female center branch ports, this is to help position your center port to the most convenient position.
OPTIONALLY you can add the provided crush washer OVER the doughty ring on the male thread of part "h" to help position the preferred center port.
VERY IMPORTANT: Do not exceed 5ft lbs torque (60 in lbs) when tightening "part h" in the engine's sensor port.
Keep in mind that we provide you with an elbow fitting "f.1" and a straight fitting "f.2" option to connect to the center port of "part h"; consider this when planning how to connect and route your hose.
Once one of the 3 center branch ports of "part h" is verified, secure the other 2 center ports with the small plugs that came with the fitting (use can use sealant to secure them).
- Now reconnect the oil sensor to the end branch of part "h" but be sure that the original washer is still attached to the male side of your oil sensor. OEM oil sensors usually come with their own washers or rings located on the base of the oil sensors male thread, but if you have a 3rd party oil sensor then consider using a crush washer, o-ring, or doughty ring - which are all compatible with the female ends of part "h". Now apply thread sealant and insert your oil sensor into the END branch of the tee fitting (part h) and remember to reconnect the oil sensor cable.
- Choose part "f.1" or "f.2" to connect to the center branch of part "h", this is the fitting that will connect to your hose fitting so consider the position of where part f.1 or f.2 will be pointing. Apply sealant and insert part “f.1" or "f.2” into the center branch of the tee fitting (part "h"). Once complete, it should look similar to the image below, but the fittings will be black and the center branch fitting (part "f") will either be an elbow fitting or a straight fitting.


CONNECT THE HOSE TO THE TEE FITTING
- Now connect and tighten the hose fitting (part “e”) to the center branch of the tee (part “f.1 or f.2”). The image below shows an example, but remember the center branch (part "f") that is connected to the hose (part "e") is either an elbow or straight fitting. Place the hose aside for now and begin working on the mounting location.

-
WHERE TO MOUNT THE FILTER
- Remove the cover shield to gain access to the mounting bolt seen in the image below.
- The primary mounting location is under the hood on the passenger side. Towards the front of your vehicle you will see a bolt that you can remove and re-use to mount the “Under-the-Hood” bracket (part “b”) See images below for reference.
Note: We’ve provided you with a separate universal bracket (part “i“) just in case you would like to mount your filter in an optional location like the area under the radiator fluid, however, the bracket (part "b) is the most popular mounting location our users prefer so the following instructions is for that location.

-
-
INSERT THE EXTREME FILTER HOUSING INTO THE BRACKET
- Insert Extreme filter into the ring of the bracket and tighten the bracket with a #6 hex key, be sure to leave enough room to close the hood of your engine. Make sure it's secure but do not over tighten to the point it damages the housing or the bracket.

FINAL STEPS
- Be sure a filter element is inserted inside your filter housing.
- Tighten your filter housing cap (30-35ft lbs torque) with a 3/8 hex tool. Do not over tighten the cap or you may damage the o-ring.
- Verify all fittings are tight and hoses are safely routed, secured, and protected from anything hot, sharp, or in motion (use zip ties if needed).
- For best results change the oem stock filter and oil at this time.
- Run engine for 30+ seconds and check for leaks and to fill the housing with oil.
- The housing will fill with oil and you may need to top-off your oil. The EXTREME filter increases oil capacity about 1 quart (top off oil as you normally would by removing the oil filler cap and pouring oil through the oil filler spout). Check your oil levels and SLOWLY add oil until the levels reach the full line.
- Make sure your oil filler cap is secure.
- Now run engine to operating temperatures/pressure and drive around the block and verify no engine leaks.
- Double check that the housing cap is secure at 30-35 ft lbs torque again .
Congratulations! You’ve completed the installation of your EXTREME bypass oil filter!
Need assistance? Contact us at:
Email: Support@InsaneDiesel.com
Phone: (801) 901-0667 | MON-FRI, 9am-5pm MST
Website: InsaneDiesel.com
Assembly and installation should be completed (or modified) by professional/skilled mechanic or technician.