


Cummins Titan XD 5.0 Installation Guide
PREPARATION
- Your kit includes the following:
- EXTREME X2 filter housing and filter element refill
- 13ft of hose
- (a) Cummins oil filler cap
- (b) 2 male JIC fittings
- (c) 4 female JIC fittings
- (d) 1 small male JIC fitting
- (e) 1 elbow JIC fitting (2MP)
- (f) Parker tee fitting
- (g) Universal mount with hardware
Additional items you will need: Teflon tape or thread sealer and zip ties.

- Install elbow fitting (part “e”) securely into the oil filler cap (part “a”) using thread sealer or teflon tape (see image below). Replace your stock oil filler cap with this new oil filler cap.

- Apply teflon tape to the two straight JIC fittings (part “b”) and insert them into the “IN” and “OUT” port of your EXTREME X2 filter housing. Install as firmly and deeply as possible. TIP: To avoid scratching your new filter you can use the bracket, and a vice, to hold the filter in place while you tighten the fittings. See images below.

- Insert one female JIC fitting (part “c”) into each end of the hoses. TIP: Apply oil, lubricant, or water on the fittings to make inserting them into the hose easier. You can use a hard surface to push the hose into the fitting (see example below) and you know you have inserted the fittings securely when the yellow guard will no longer spin around. See image below for example:

OIL PRESSURE PORT
- Remove your stock oil filter to make room to access the oil pressure sending unit
- The oil pressure sending unit is located here (see image below)

- Remove the connector from the oil pressure sending unit by following the instructions seen below:

- Use a 27mm deep socket wrench to remove your oil sending unit
- Place the washer (provided to you with part #f) onto your oil sending unit, apply teflon or other sealant, and secure the sending unit into the T fitting (part #f). See image below for reference:

- Apply teflon tape or other sealant to the other side of the T fitting (part #f) and use a 22mm wrench to securely insert it back into your oil filter housing. Apply sealant to part #d and use a 16mm socket/wrench to insert it into the center branch of your T fitting (part #f). Reconnect the sending unit wire. When this is complete your oil sending port should look like the image below: TIP: The tee fitting has a “lock nut” that allows you tighten the fitting while aiming the center branch to an accessible position. First tighten the entire tee fitting as much as you can, position the center branch to where you can easily access it, then tighten the lock nut to secure the fitting.

- Now connect and tighten the 6 ft hose fitting (part “c”) to the center branch of the T (part “d”). Place the hose aside for now and begin working on the mounting location. See image below for reference:

WHERE TO MOUNT THE FILTER
FRAME MOUNT OPTION
- The primary mounting location is on the driver side frame (near the transfer case), use the length of the hose to help determine the best location on your frame.
- Use your universal frame mount bracket (part #g) to determine where the holes will be made to secure the bracket.
- We used a self tapping screw (#14 size) to make two holes in the frame, we slipped the bracket underneath the wiring and secured the bracket to the frame with the tapping screws. See image below for reference:

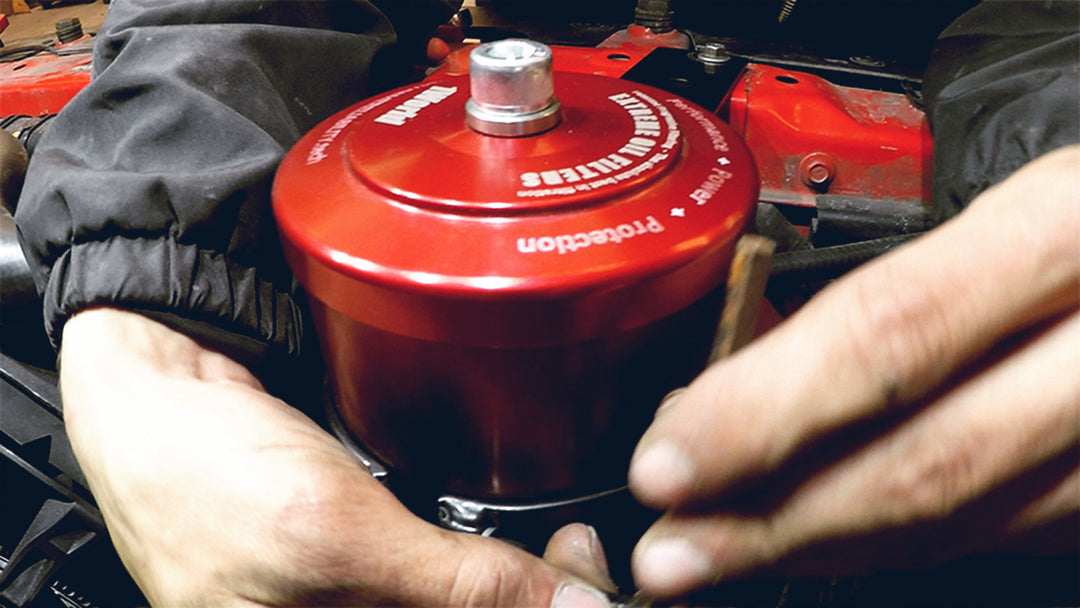
- Be sure a filter element is inserted inside your filter housing.
- Tighten your filter housing cap to about 8-10ft lbs torque with a 3/8 hex tool. Do not over tighten the cap or you may damage the o-ring.
- Use the universal bracket hardware (part #g) to secure your new EXTREME X2 housing to the universal mounting bracket. See image below for reference:

- Secure both hoses to the bottom of the EXTREME X2 filter housing. The port labeled “IN” should be connected to the pressure port hose. The port labeled “OUT” goes to the oil filler cap. See image below for reference:

“UNDER THE HOOD” MOUNT OPTION
Use the following instructions and the image below to install the “under the hood” bracket.
1) Carefully move this coolant line about an inch out of the way to make room for the bracket and the housing.
2) Remove the bolt seen in the image below (#2), this is where the tip of your bracket will be bolted too using the original bolt you just removed.
3) You may need place a couple washers beneath the bracket in this area (#3) to level it out, then use a bolt and nut to tighten it in place.
4) Place your filter housing in the bracket and be sure it will clear the hood when the hood closes. Use #6 hex key to tighten the bracket and secure the filter housing.


OIL RETURN
- The hose connected to the OUT port of the EXTREME X2 filter now needs to be connected the oil filler cap.
HOSE ROUTING
- Route the hose away from anything hot, sharp, or moving. Use zip ties to secure the hoses and try to keep them protected from vibration/abrasion.
FINAL STEPS
- Verify all fittings are tight and hoses are safely routed, secured, and protected.
- For best results change the stock filter and oil at this time.
- Run engine for 30 seconds and check for leaks.
- Top-off oil as necessary, the EXTREME filter increases the oil capacity of your engine, check your oil levels and it off as you normally would by removing the oil filler cap and pouring oil through the oil filler spout.
- Now run engine to temperature and drive around the block then verify no engine leaks once engine operating temperature and pressures are reached.
Congratulations! You’ve completed the installation of your EXTREME bypass oil filter!
Need assistance? Contact us at:
Email: Support@InsaneDiesel.com
Phone: (801) 901-0667 | MON-FRI, 9am-5pm MST
Website: InsaneDiesel.com
We recommend that assembly and installation be done (or modified) by professional/skilled mechanic or technician.